In this tutorial we will walk through the process of creating an Excel XLSX report based on a wpDataTable.
Here we will create a single report for all table rows. If you would like to generate a separate Excel file for each table row please look here.
Let’s see an example first. Try to filter the table and download several report options (click “Download report”) to see how the generated reports follows:
| wdt_ID | Client | Date | Product | Price | Qty | Total | Tax |
|---|---|---|---|---|---|---|---|
| 1 | Joshua Hamilton | 04/04/2016 | Wireless Headphone | 44,00 | 10 | 440,00 | 79,20 |
| 2 | Connor John | 04/04/2016 | Gaming Keyboard | 38,00 | 8 | 304,00 | 54,72 |
| 3 | Ewan Griffiths | 06/04/2016 | LCD HD Monitor | 120,00 | 5 | 600,00 | 108,00 |
| 4 | Ewan Griffiths | 07/04/2016 | LCD HD Monitor | 120,00 | 6 | 720,00 | 129,60 |
| 5 | Larry Lowery | 08/04/2016 | Wireless Headphone | 44,00 | 7 | 308,00 | 55,44 |
| 6 | Joshua Hamilton | 08/04/2016 | Gaming Keyboard | 38,00 | 8 | 304,00 | 54,72 |
| 7 | Joshua Hamilton | 09/04/2016 | Mini Wireless Keyboard | 33,00 | 2 | 66,00 | 11,88 |
| 8 | Marc Kline | 09/04/2016 | USB HD Webcam | 15,00 | 4 | 60,00 | 10,80 |
| 9 | Ewan Griffiths | 10/04/2016 | Gaming Keyboard | 38,00 | 2 | 76,00 | 13,68 |
| 10 | Larry Lowery | 10/04/2016 | USB HD Webcam | 15,00 | 9 | 135,00 | 24,30 |
| wdt_ID | Client | Date | Product | Price | Qty |
Let’s walk through the creating process of such a report.
1. Prepare a source wpDataTable which will be the data provider
As Report Builder is fully integrated with wpDataTables. This table was created in Table Constructor, it has the following fields: “Client” (string), “Date” (date), “Product” (string / selectbox), “Price” (float) and “Quantity” (integer). Additionally, tax and total are calculated by formula/calculated columns.
To see how to create such tables with wpDataTables table constructor here.
To see how to use formula columns, click here.
2. Prepare the Excel XLSX template for the report.
Prepare an Excel file, with the layout that you need for the report. We used:
- Predefined variables: ${generatorname}, ${today}
- Additional variables: ${customer}, ${invoicenumber}
- Cell values from wpDataTable: ${product.all} (product name), ${quantity.all} (products quantity), ${price.all} (price), ${formula_1.all} (row total), ${formula_2.all} (row tax)
- Totals: ${formula_1.total} (price total), ${formula_2.total} (tax total)
To download the template click here.
See here the full list of rules of preparing templates for ReportBuilder.
3. Create a report in WordPress admin page through Report Builder Wizard.
Go to WP-admin, open ReportBuilder -> Create a new report
On the first step choose the source wpDataTable:

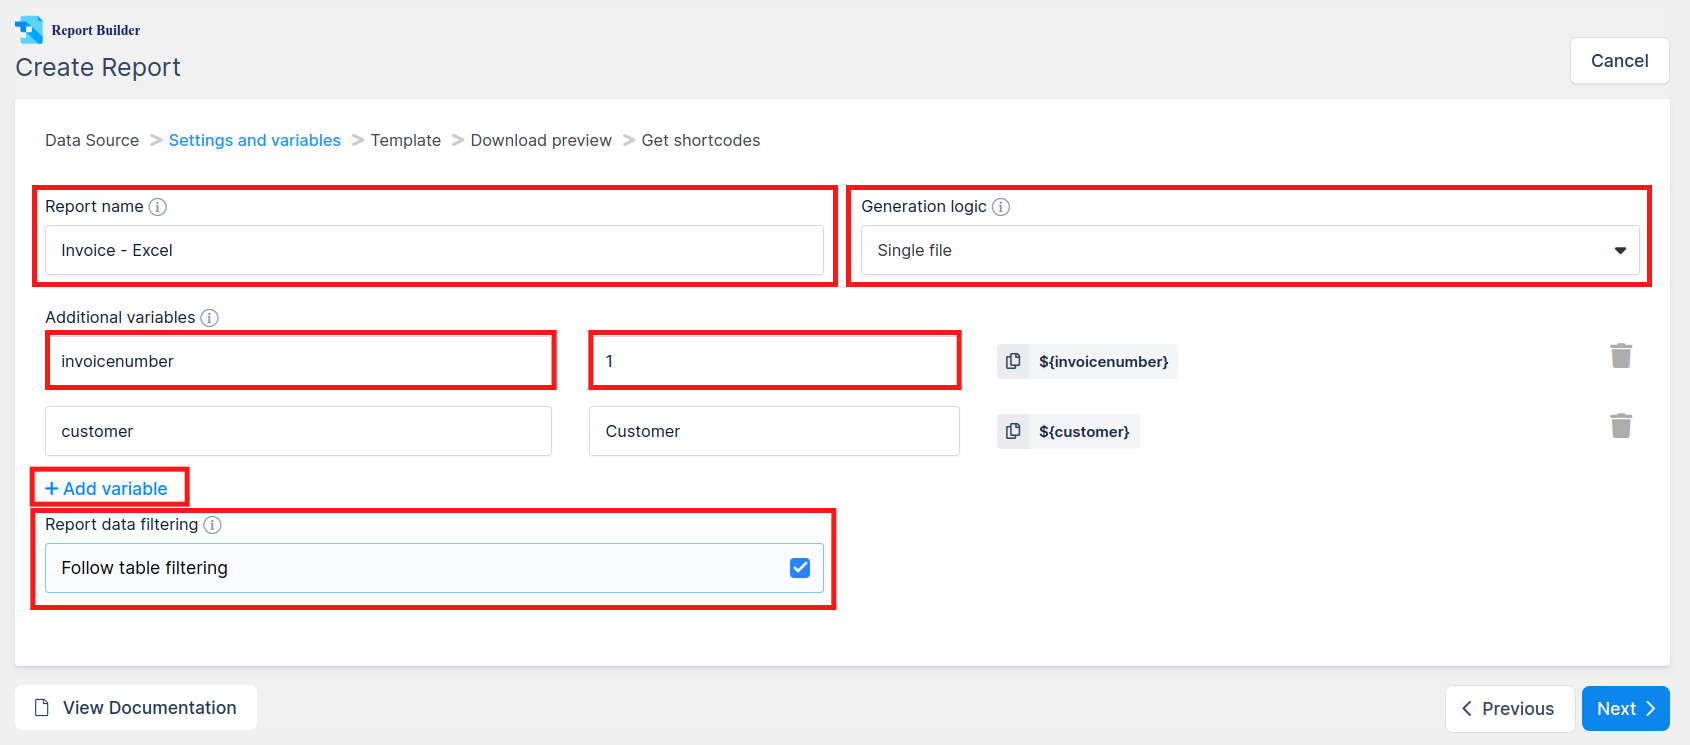
On the next step provide the report name, choose ‘Single file’ generation logic (which means we’ll create a single file for whole table, not a separate file for each row), tick “Follow table filtering”, and define 2 additional variables (“invoicenumber” and “customer”):

Then upload the template that you have prepared (click “Browse…“, drag&drop the file, click “Use template”):

On the next step you can download the preview for X first rows of the table:

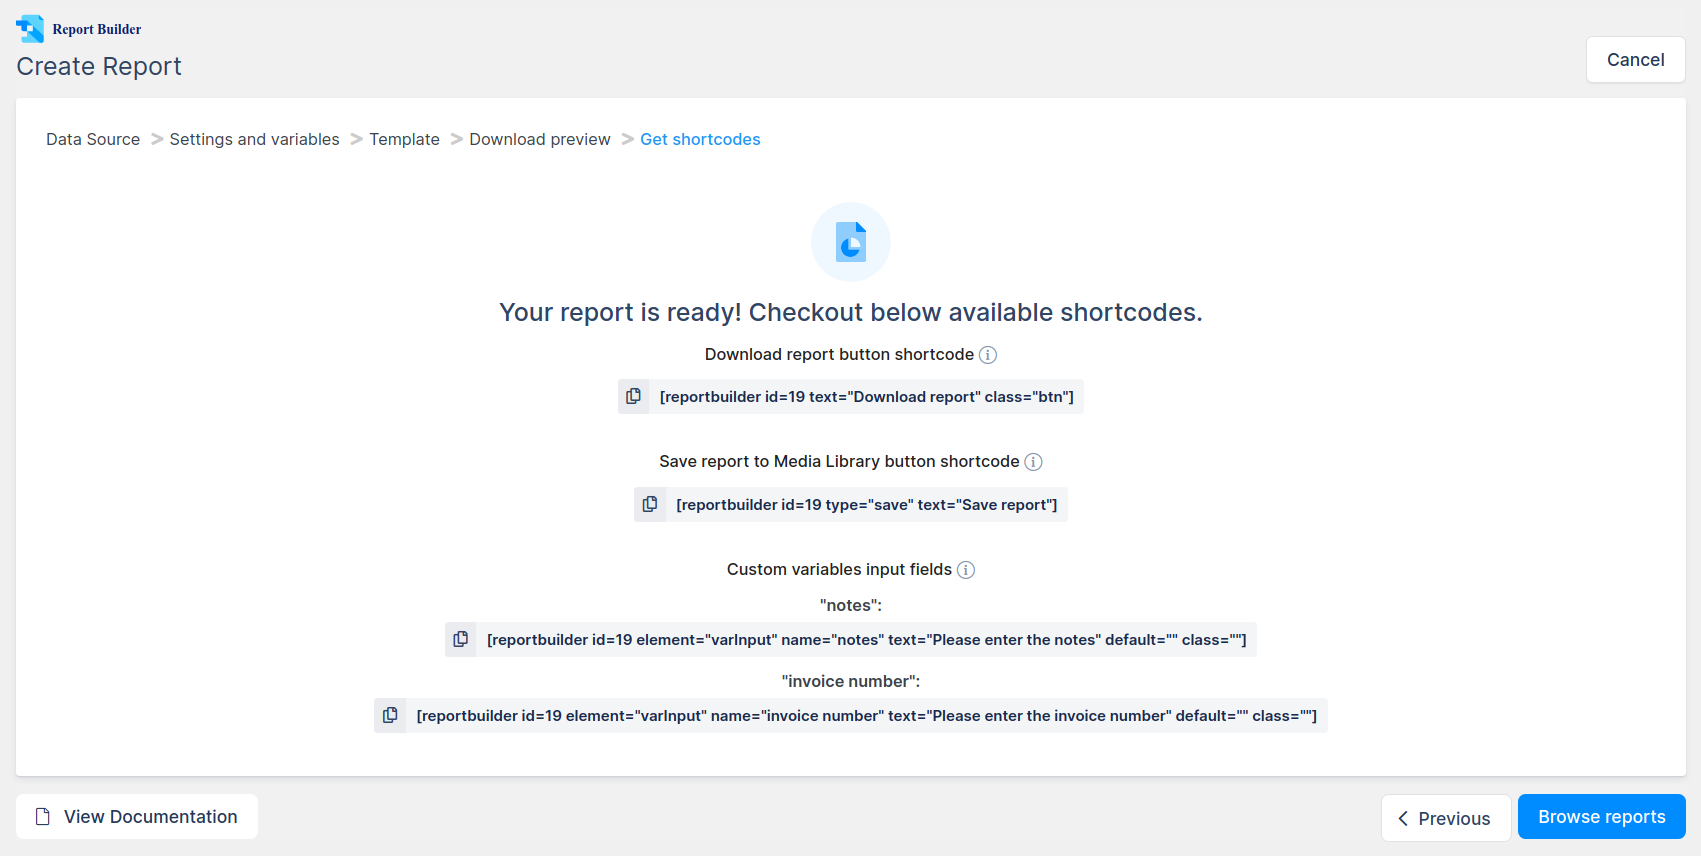
If you are satisfied, you can click “Save Report” to store the result, if something is wrong, you can go back in the wizard and change the settings or upload a different template. Once you click “Save Report”, you will see the shortcodes for this report:

The shortcodes contain buttons for downloading report, saving report to WP Media Library, and for inputs for additional variables.
You can copy these shortcodes directly from this page by clicking on shortcode button, but this isn’t necessary as you can always generate these in standard WordPress post/page editor, or in Visual composer.
Once you close the wizard you will be redirected to the Browse page. You can always quickly download the report (for the whole table) from there by clicking the “Download” button, or quickly get the list of available shortcodes.
The last thing to do is to insert the Report controls to the post or page where you need them, so the users would be able to use it:
